How to File And Shape Your Nails
Mastering the skill of filing and shaping your nails is an essential part of maintaining nail health and achieving a polished, groomed look. This article will teach you the proper techniques for filing your nails to your desired shape. You’ll learn the importance of using the right tools, how to choose a flattering nail shape for your hands, the correct way to file to avoid damaging your nails, as well as tips for buffing and caring for your cuticles.

How to Prepare to File Your Nails
It’s very important to clean your hands before filing your nails. This simple step stops dirt, oils, or bacteria from getting pushed into your nails or cuticles during filing.
1. Washing with Soap and Warm Water
Use a mild soap and warm water to wash your hands well, gently scrubbing every area including under the nails and around the cuticles. This will remove any built-up grime or debris.
2. Drying Thoroughly to Prevent Nail Breakage
After washing, make sure to dry your hands completely using a clean towel. Even a little bit of moisture left on your nails can cause them to become brittle and more likely to split, crack or break when you file them.
Starting with freshly cleaned and thoroughly dried hands creates the ideal surface for shaping your nails properly. This basic prep work lays the groundwork for getting smooth, even results without accidentally damaging your nails.

How to Choose the Right Tools for Filing
When shaping your nails, having the right tools is essential. Your nail file and base coat hold a lot of weight, so invest in quality products.
Opt for a soft, flexible file designed to sculpt natural nails. Avoid harsh metal files that can splinter delicate nails. For the base coat, choose a strengthening formula that nourishes and protects the nail.
Proper tools allow you to precisely sculpt curves and taper to perfection. When creating a flawless sculptured nail, the file and base coat become your greatest sculptors.
Apply polish and base coats in clean, even layers for a smooth, cushiony canvas. With the right tools, achieving an on-trend, long-wearing nail is an artisan task, allowing your nails to look professionally polished.
Deciding on Your Nail Shape
The shape of your nails can really change the overall look of your hands and complement your personal style. There are several popular nail shapes to choose from:
1. Oval for Durability and an Elongated Appearance
The oval shape is one of the most low-maintenance options, as the lack of harsh edges makes it less prone to chipping or breaking. The curved edges give nails an elongated, feminine look.
2. Square for a Bold Look Suitable for All Lengths
With straight edges and a flat tip, the square nails shape provides a bold, structured look. It works well on shorter and longer nails alike.
3. Almond for Slenderizing the Fingers
The almond shape nails tapers gradually to a rounded point, creating the illusion of slender, elegant fingers. It’s softer than a stiletto shape.
4. Squoval as an Easy and Versatile Option
A hybrid of square and oval, the squoval features squared edges with slightly rounded corners for a lived-in, low-maintenance style.
5. Coffin for a Dramatic Effect With a Squared-off Tip
The coffin or ballerina shape is long and narrow with a squared-off flat tip, giving nails an elongated, dramatic look.
6. Stiletto for a Sharp and Unique Style
The stiletto is a bold statement shape, with a long length that tapers to a sharp, claw-like point. It requires significant maintenance.
Consider your lifestyle, nail length preferences, and personal aesthetic when choosing your ideal nail shape. With some experimenting, you’ll find the one that flatters your hands best. Stay ahead of the curve by exploring the best summer 2024 nail trends to discover styles that complement your chosen shape.

How to File Your Nails Properly
Filing your nails into the desired shape takes the right technique to avoid damaging them. With some practice and patience, you can master the filing process.
1. Get the Right Starting Shape
Use nail clippers or scissors to trim your nails close to the desired overall shape and length before filing. Don’t cut them too short - leave some length to sculpt with the file.
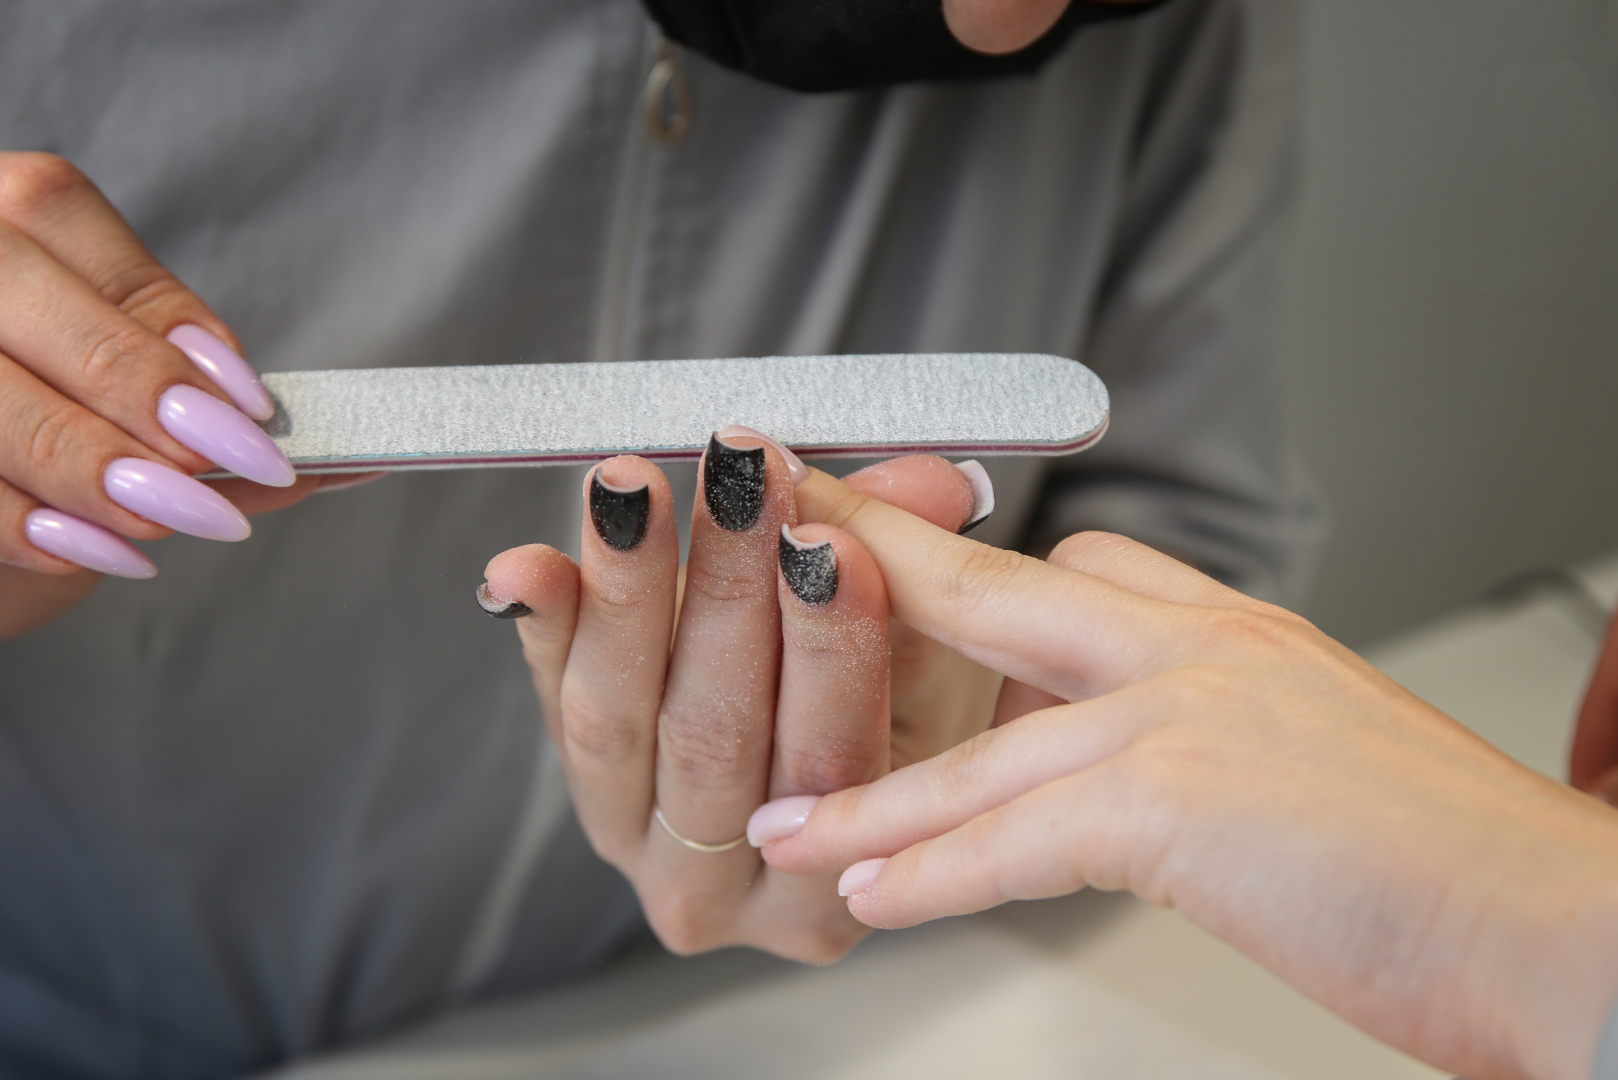
2. The Correct Way to File
- Hold the file at a 90-degree angle straight across the edge of your nail. This allows you to shape and define the edges precisely.
- As you file, you’ll need to adjust the angle of the file to follow the curve for shapes like oval or almond.
- File using single, firm strokes in one direction. Avoid the back-and-forth sawing motion as this can splinter nails.
- When shaping curved edges, file from the outer corner into the center of the nail to create an even, smooth curve.
- Keep checking that both hands are being filed evenly by comparing the nail shapes frequently as you work.
By filing carefully with the proper technique and frequently checking your work, you’ll end up with nails in the perfect shape you want.
How to Polish Your Nail Shaping Skills
After filing your nails into the desired shape, a few extra steps will give you a truly flawless, professional-looking finish. Smoothing the nail surface and caring for your cuticles are essential finishing touches.
1. Smoothing the Nails
Use a three-way buffer or shiner board to buff and create a glossy finish without any ridges. Gently move the buffer back-and-forth over the tops of your nails. Start with the coarsest grit to remove ridges, then progress to the finer grits. This will leave the nails gorgeously smooth and shiny.
2. Caring for Cuticles and Nails
Proper cuticle care is just as vital as caring for the nails. After buffing, massage a few drops of cuticle oil into the base of each nail and around the cuticles. This nourishing oil hydrates with vitamins to keep cuticles healthy and prevent cracking or peeling. Make applying cuticle oil or cream a regular habit - the constant conditioning will maintain supple, groomed-looking cuticles that enhance your overall manicure.
With smooth buffed nails and hydrated cuticles, you’ve mastered the professional finishing touches for beautifully shaped nails.

Keep Your Nails Looking Their Best
Your hard work filing and shaping your nails doesn’t stop once you’ve achieved the perfect look. Ongoing maintenance is key to preserving your sculpted nails between shaping sessions.
1. Keeping Nails in Shape
After filing, you may want to apply nail polish to complete the manicured look. Be sure to start with a base coat to prevent staining and make the polish last longer. Then apply color in thin, even coats, sealing it with a protective top coat.
Your nails will continue growing, so re-file every 2-3 weeks using the same shaping techniques. Carefully re-shape any new growth to maintain your intended nail shape. Take care not to over-file though, as being too aggressive can weaken nail plates over time. Just gently file what’s needed.
2. Caring for Nails Daily
Continue caring for your cuticles daily by massaging in a nourishing cuticle oil or cream. This hydrates the entire nail area keeping cuticles healthy-looking. You can also apply a keratin or strengthening base coat which helps fortify nails so they are less prone to breaking or peeling as they grow out.
Mastering Beautifully Shaped Nails
Achieving flawlessly shaped nails requires the right approach. Start with clean, dry hands and quality filing tools. Carefully file using proper techniques for your desired nail shape. Don’t forget buffing for smoothness and applying cuticle oil. Most importantly, keep up regular nail maintenance by re-shaping and hydrating nails daily. With practice and patience, you can master professional-level, sculpted nail perfection.
And for those seeking an even more effortless and convenient way to get stunning nails, try our press on nails! They offer a quick and easy solution for achieving beautiful nails in no time.
